Instructions for enterprises
In Helen’s e-services, you can now do online transactions using just one username. The instructions will tell you how to include all Helen’s contracts in the same service, how to grant and remove user rights and how to add the information of another company to the service. There are also instructions on how to remove usernames or transfer them to another person.
THE INSTRUCTIONS INCLUDE THE FOLLOWING FUNCTIONS
- Bring other Helen contracts into the service
- Grant user right for the customer account to another person
- Remove user right for the customer account
- Add the details of another company to the service
- Remove usernames or transfer the rights to another person
AT FIRST
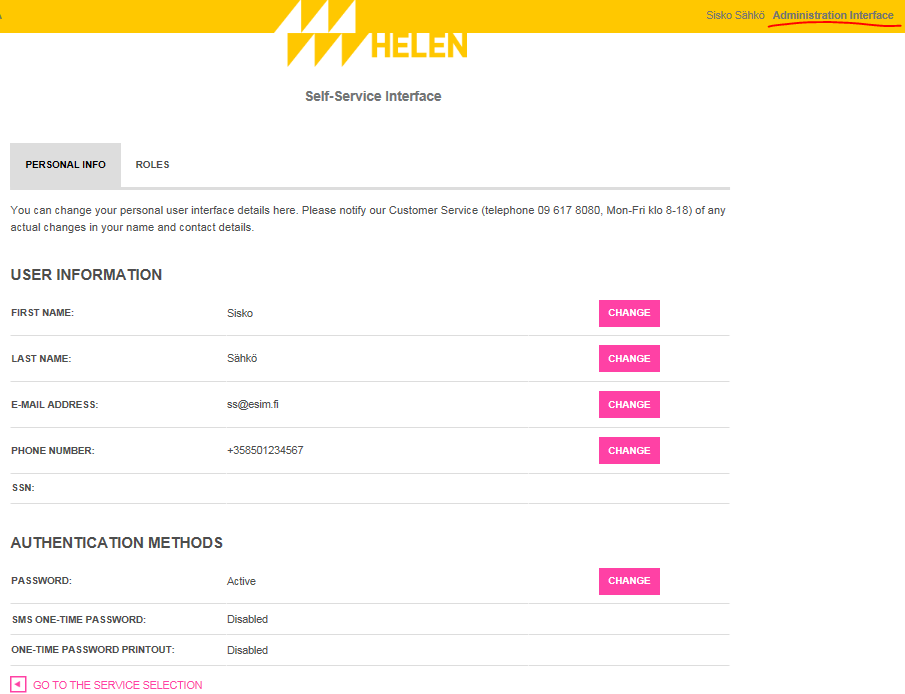
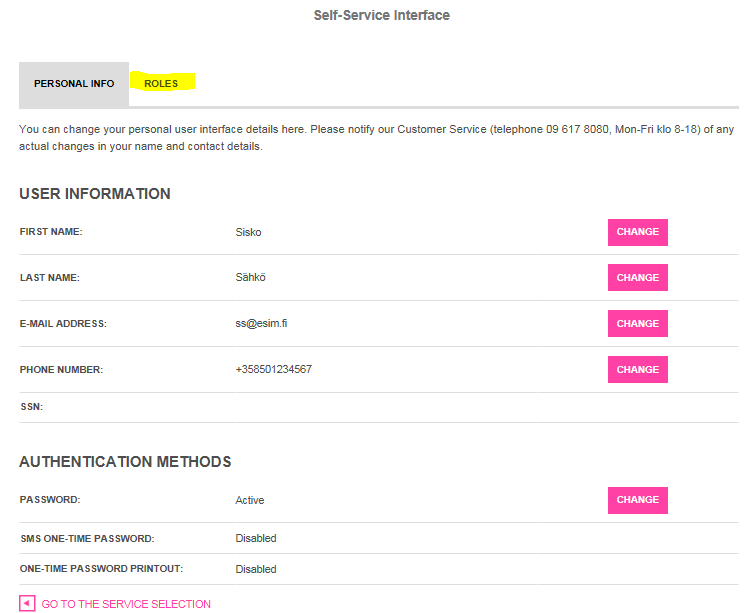
Go to the page where you can browse and edit your customer account information.
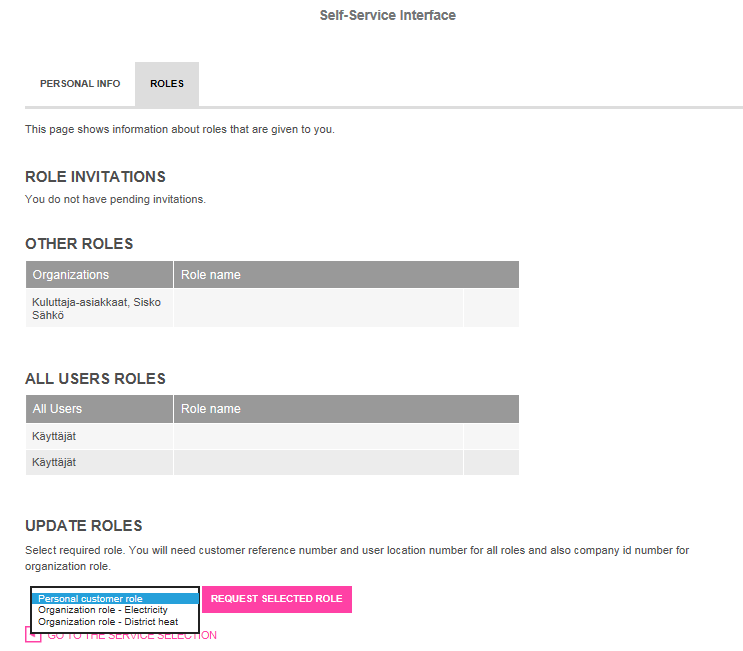
1. BRING OTHER HELEN CONTRACTS INTO THE SERVICE
If the company has both an electricity and a district heating contract, the details of the other customer account are added to the service as follows.
Open the ’Roles’ tab.

If you have registered into the service using the details on the district heating invoice, please select from the drop-down menu
’Organization role - Electricity’.
If you have registered into the service using the details on the electricity contract, please select from the drop-down menu ’Organization role - District heat’.
Click ’Request selected role’.

Fill in the ’User location number’ and ’Owner number’. You will find this information on your district heat invoice. Click ’Next’, and then follow the instructions.
Finally, select ’Move to service selection’.
2. GRANT USER RIGHT FOR THE CUSTOMER ACCOUNT TO ANOTHER PERSON
You can allow another person to browse the information regarding your business customer account even if they do not have a valid contract with Helen (e.g. consultant, housing manager).
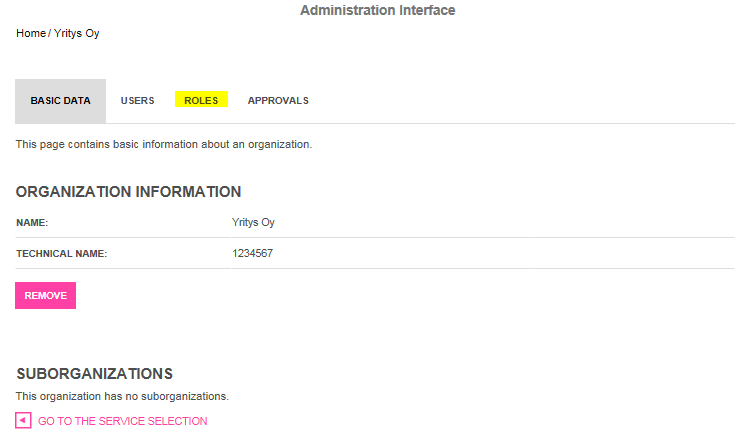
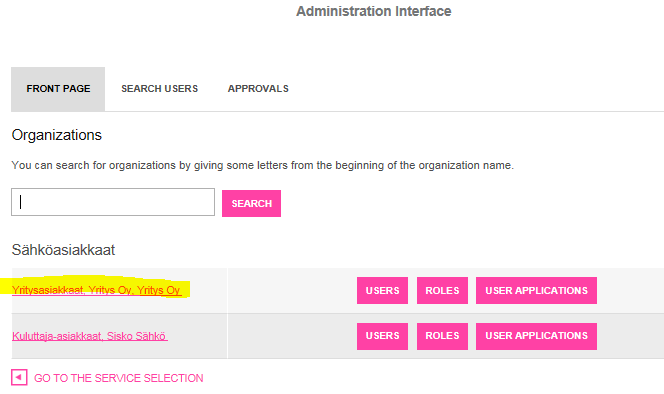
Select ’Administration Interface’.
Select the customer account for which you wish to grant the user right.

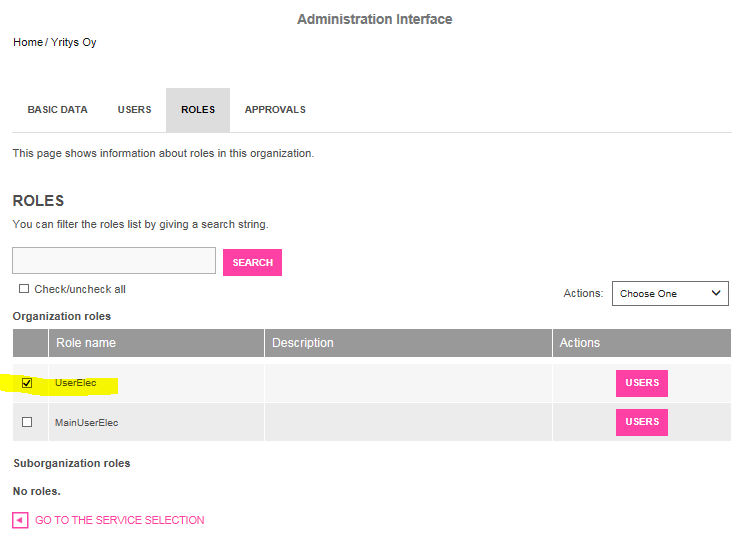
Open the ’Roles’ tab.
Select ’UserElec’.
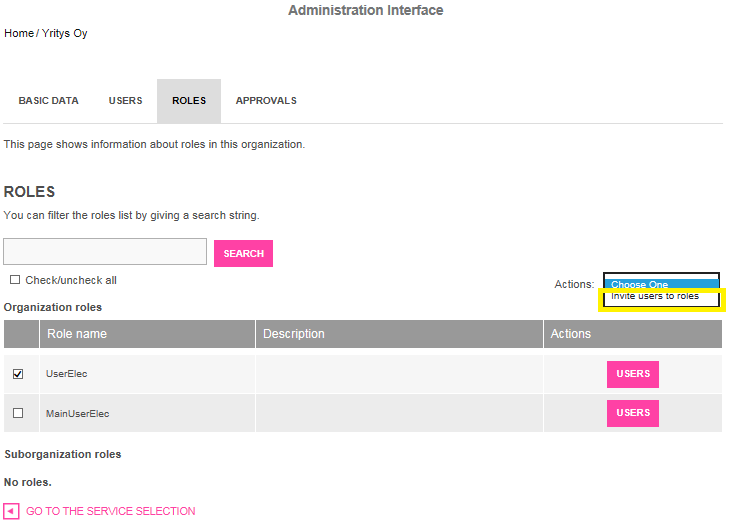
From the drop-down menu, select ’Invite users to roles’.
Stage 1, Contact information: Enter the email address of the person you are inviting, and click ’Next’.
Stage 2, User details: Enter the first and last name of the person you are inviting, and click ’Next’. If the email address is already in use, i.e. the person has already logged in to the service, the service will automatically offer their name.
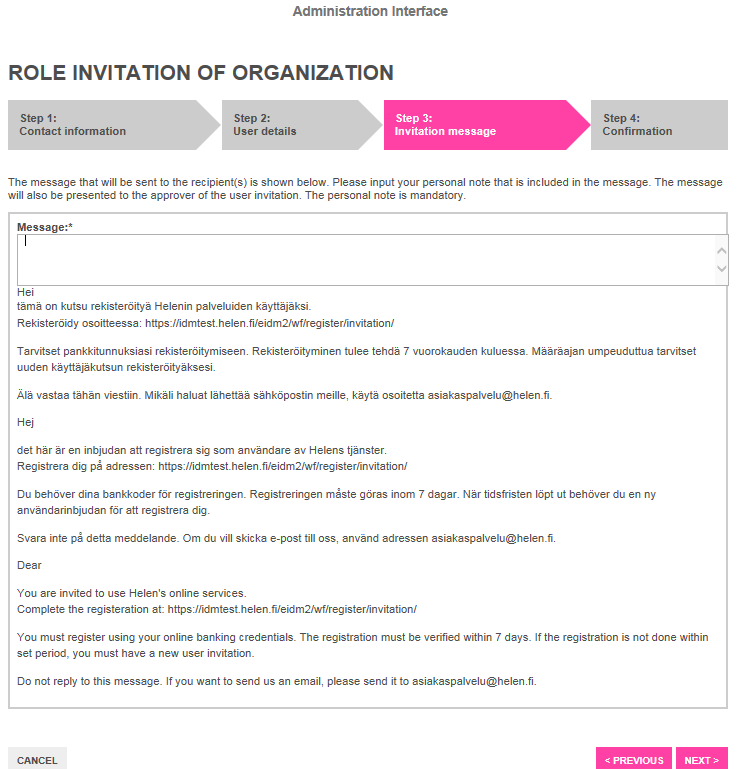
Stage 3, Invitation message: Write a message (mandatory data) and click ’Next’.
Stage 4, Confirmation: Check the information in the user right invitation. If the information is correct, click ’Accept’.
The user right invitation has been sent. You can access e-services by clicking ’Go to the service selection’.
The invited person will receive the user right invitation in their email. If they have not yet registered as a user of Helen’s e-services, they must do so within seven days from receiving the email at www.helen.fi/en/login/.
If they have already registered, they must log in to Helen’s e-services at www.helen.fi/en/login/ and accept the user right invitation in the service by clicking ’Process’ next to the user right invitation and then clicking ’Accept’.
3. REMOVE USER RIGHT FOR THE CUSTOMER ACCOUNT
If you have granted another person (e.g. consultant, housing manager) a user right to your personal customer account, you can remove this user right if you so wish.
Select ’Administration Interface’.

Select the customer account from which you wish to remove the user right.
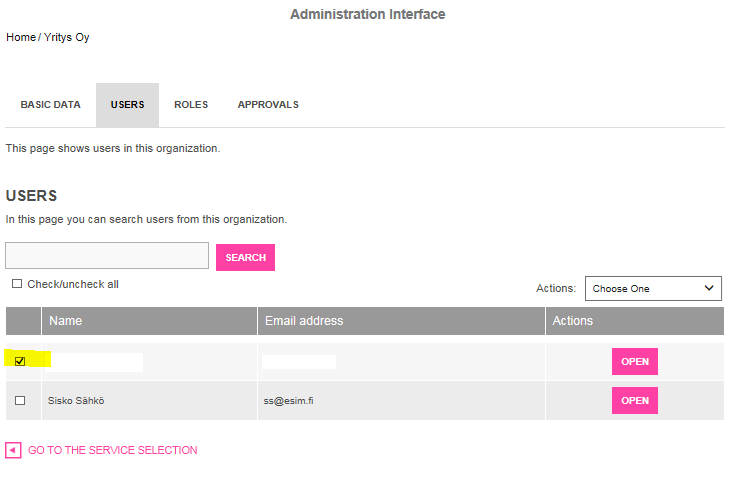
Open the ’Users’ tab and select the user you want to remove.
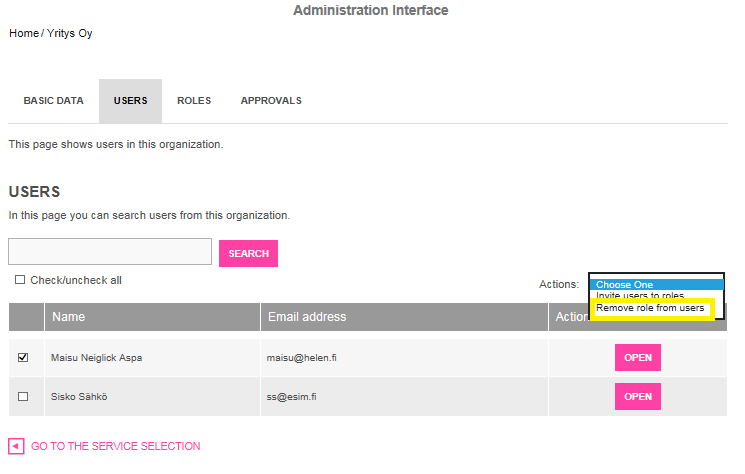
From the drop-down menu, select ’Remove role from users’.
Step 1, Select role: Select the role to be removed and click ’Next’.
Step 2, Confirmation: Check that the information is correct, and then click ’Accept’.
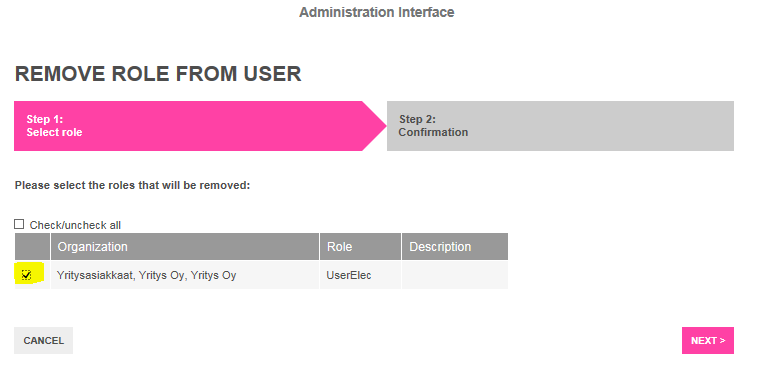
The user right has been removed. You can access e-services by clicking ’Go to the service selection’.
4. ADD THE DETAILS OF ANOTHER COMPANY TO THE SERVICE
If you wish, you can add to the service the details of another company you represent.
If, for example, a housing manager manages several properties, they are able to register in Helen’s e-services with the usernames of one business customer, after which they can search in the service the details of other properties they represent.
If another user, e.g. the chairman of the board of a housing company, has already registered in the service, the housing manager can ask them for the right to use the property’s customer account (see section 2 in the instructions).
Open the ’Roles’ tab.
From the drop-down menu, select ’Organization role – Electricity’ if you are adding to the service a company that has an electricity invoice at their disposal.
Select ’Organization role – District heat’ if you are adding to the service a company that has a district heat or cooling invoice at their disposal.
If you want to search the information for both electricity and district heat, please repeat this procedure twice using the information for both contracts.
If you selected electricity accounts, fill in ’Electricity customer number’ and ’Metering point ID’. This information is found on your electricity invoice.
If you searched the information for a district heat contract, please enter ’Consumption point’ and ’Owner number’. These are found on your district heat invoice.
Click ’Next’, check the details and then click ’Accept’.
User registration is completed. Click ’Go to the service selection’ and select a service.
5. REMOVE USERNAMES OR TRANSFER THE RIGHTS TO ANOTHER PERSON
If you wish, you can remove your own usernames or transfer your user rights to another person. If, for example, a company employee is registered in the service and they change their employer/position, they can pass their user right for the company’s account to a new person and after that remove their own usernames.
The user right can be granted on the basis of the instruction in section 2. As an exception to the instruction, it is worth selecting ’MainUserElec’ when granting user rights.
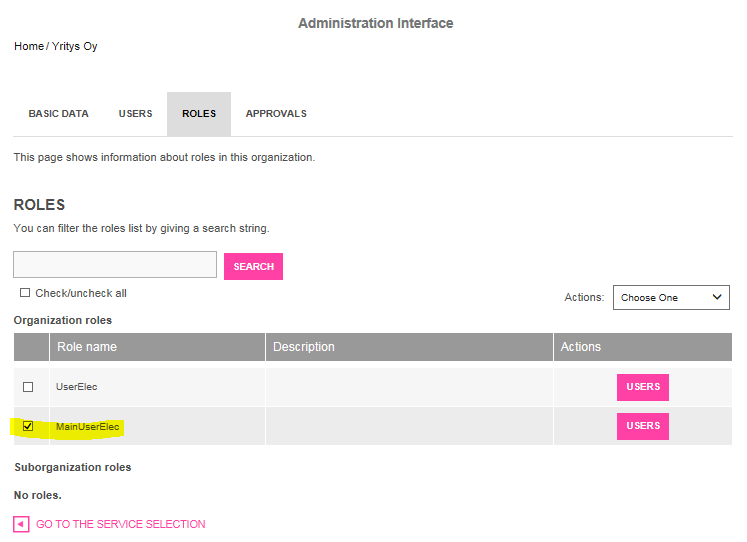
You can remove your own user right by following the instructions in section 3.